
4 Tips for Taking Better Photos of your Children (Even on your Phone)
People often ask me what settings I use when I take pictures of my girls. For me its less about the settings, and all about these 4 easy steps. Whether you use a high end DSLR or your iPhone, these tips will help you take better pictures of your kids. Take a look below at my favorite ways for taking better photos!
1. Turn off the Lights!
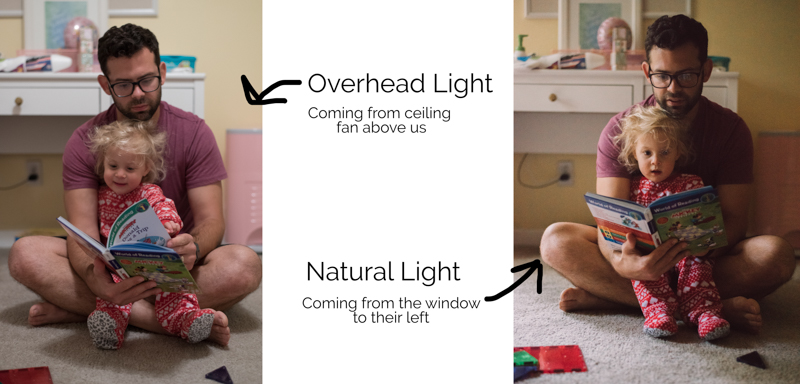
This is my favorite tip and the one that has made the biggest difference in my photography. Check out the photos below. Not a great photo by any means but look at the difference turning off the lights made. Same camera, same room, taken 2 minutes apart. Not only is the direction of the light more pleasing, but it also adds more depth to the photo. The trick here is to place your kids perpendicular to an open window. These photos were taken last night before my daughter went to bed. The sun was already low in the sky and not much light was coming into the room. You don't need a lot of light to make a pretty portrait.
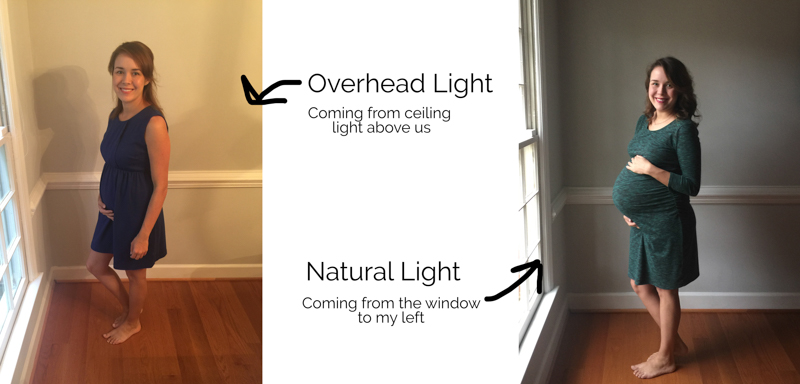
Here's another example showing what a difference turning off the lights can make. Both photos were taken with an iPhone in the same room at the same time of day. Check out the difference in the shadows behind me. Which looks more pleasing? Also, look at how yellow the overhead light makes my gray walls look! Notice again that I am standing in front of an open window. At this time of day the sun is on the opposite side of the house, so the light is soft and diffused coming through this window - basically turning my window into a big beautiful and expensive studio light!
'But my house is too dark!' Well, so is mine! When shooting on your DSLR, don't be afraid to crank up your ISO! My first example at the top - ISO 3200. Does it introduce some grain into your image? Sure! Do people care? Nope! I'd rather have a little grain and some pretty light than a flat image shot at ISO 100.
Scared to boost your ISO? Photo still too dark? Make sure you shoot RAW. Check out how I was able to save the below image by shooting in RAW. Did you know that you can shoot in RAW on your iPhone too? Shooting in RAW let me pull up all of those dark and shadowy areas while still preserving the details in the window. This is proof that you don't need a house full of big windows and natural light to get those bright and airy images that you dream of!


Below are a few more photos showing how I use the 'turn off the lights and stand next to a window' trick. The window is either in the picture or just out of the frame in each shot. The closer your subject is to the window, the more contrast you will have between the subject and background.


2. Get on their level
Take a look at the pictures on your phone. How many of the photos of your kids are taken from an angle higher than their eye level? My guess would be a lot! We're so used to seeing our little ones from above that when we take photos at their eye level it almost always adds some extra interest.
Take a look at the photos below. Notice how you as the viewer feel included when the photo is taken from your child's eye level. This is one easy way that you can make your photos look less snapshoty and more engaging.

Photo taken from above

Photo taken from eye level
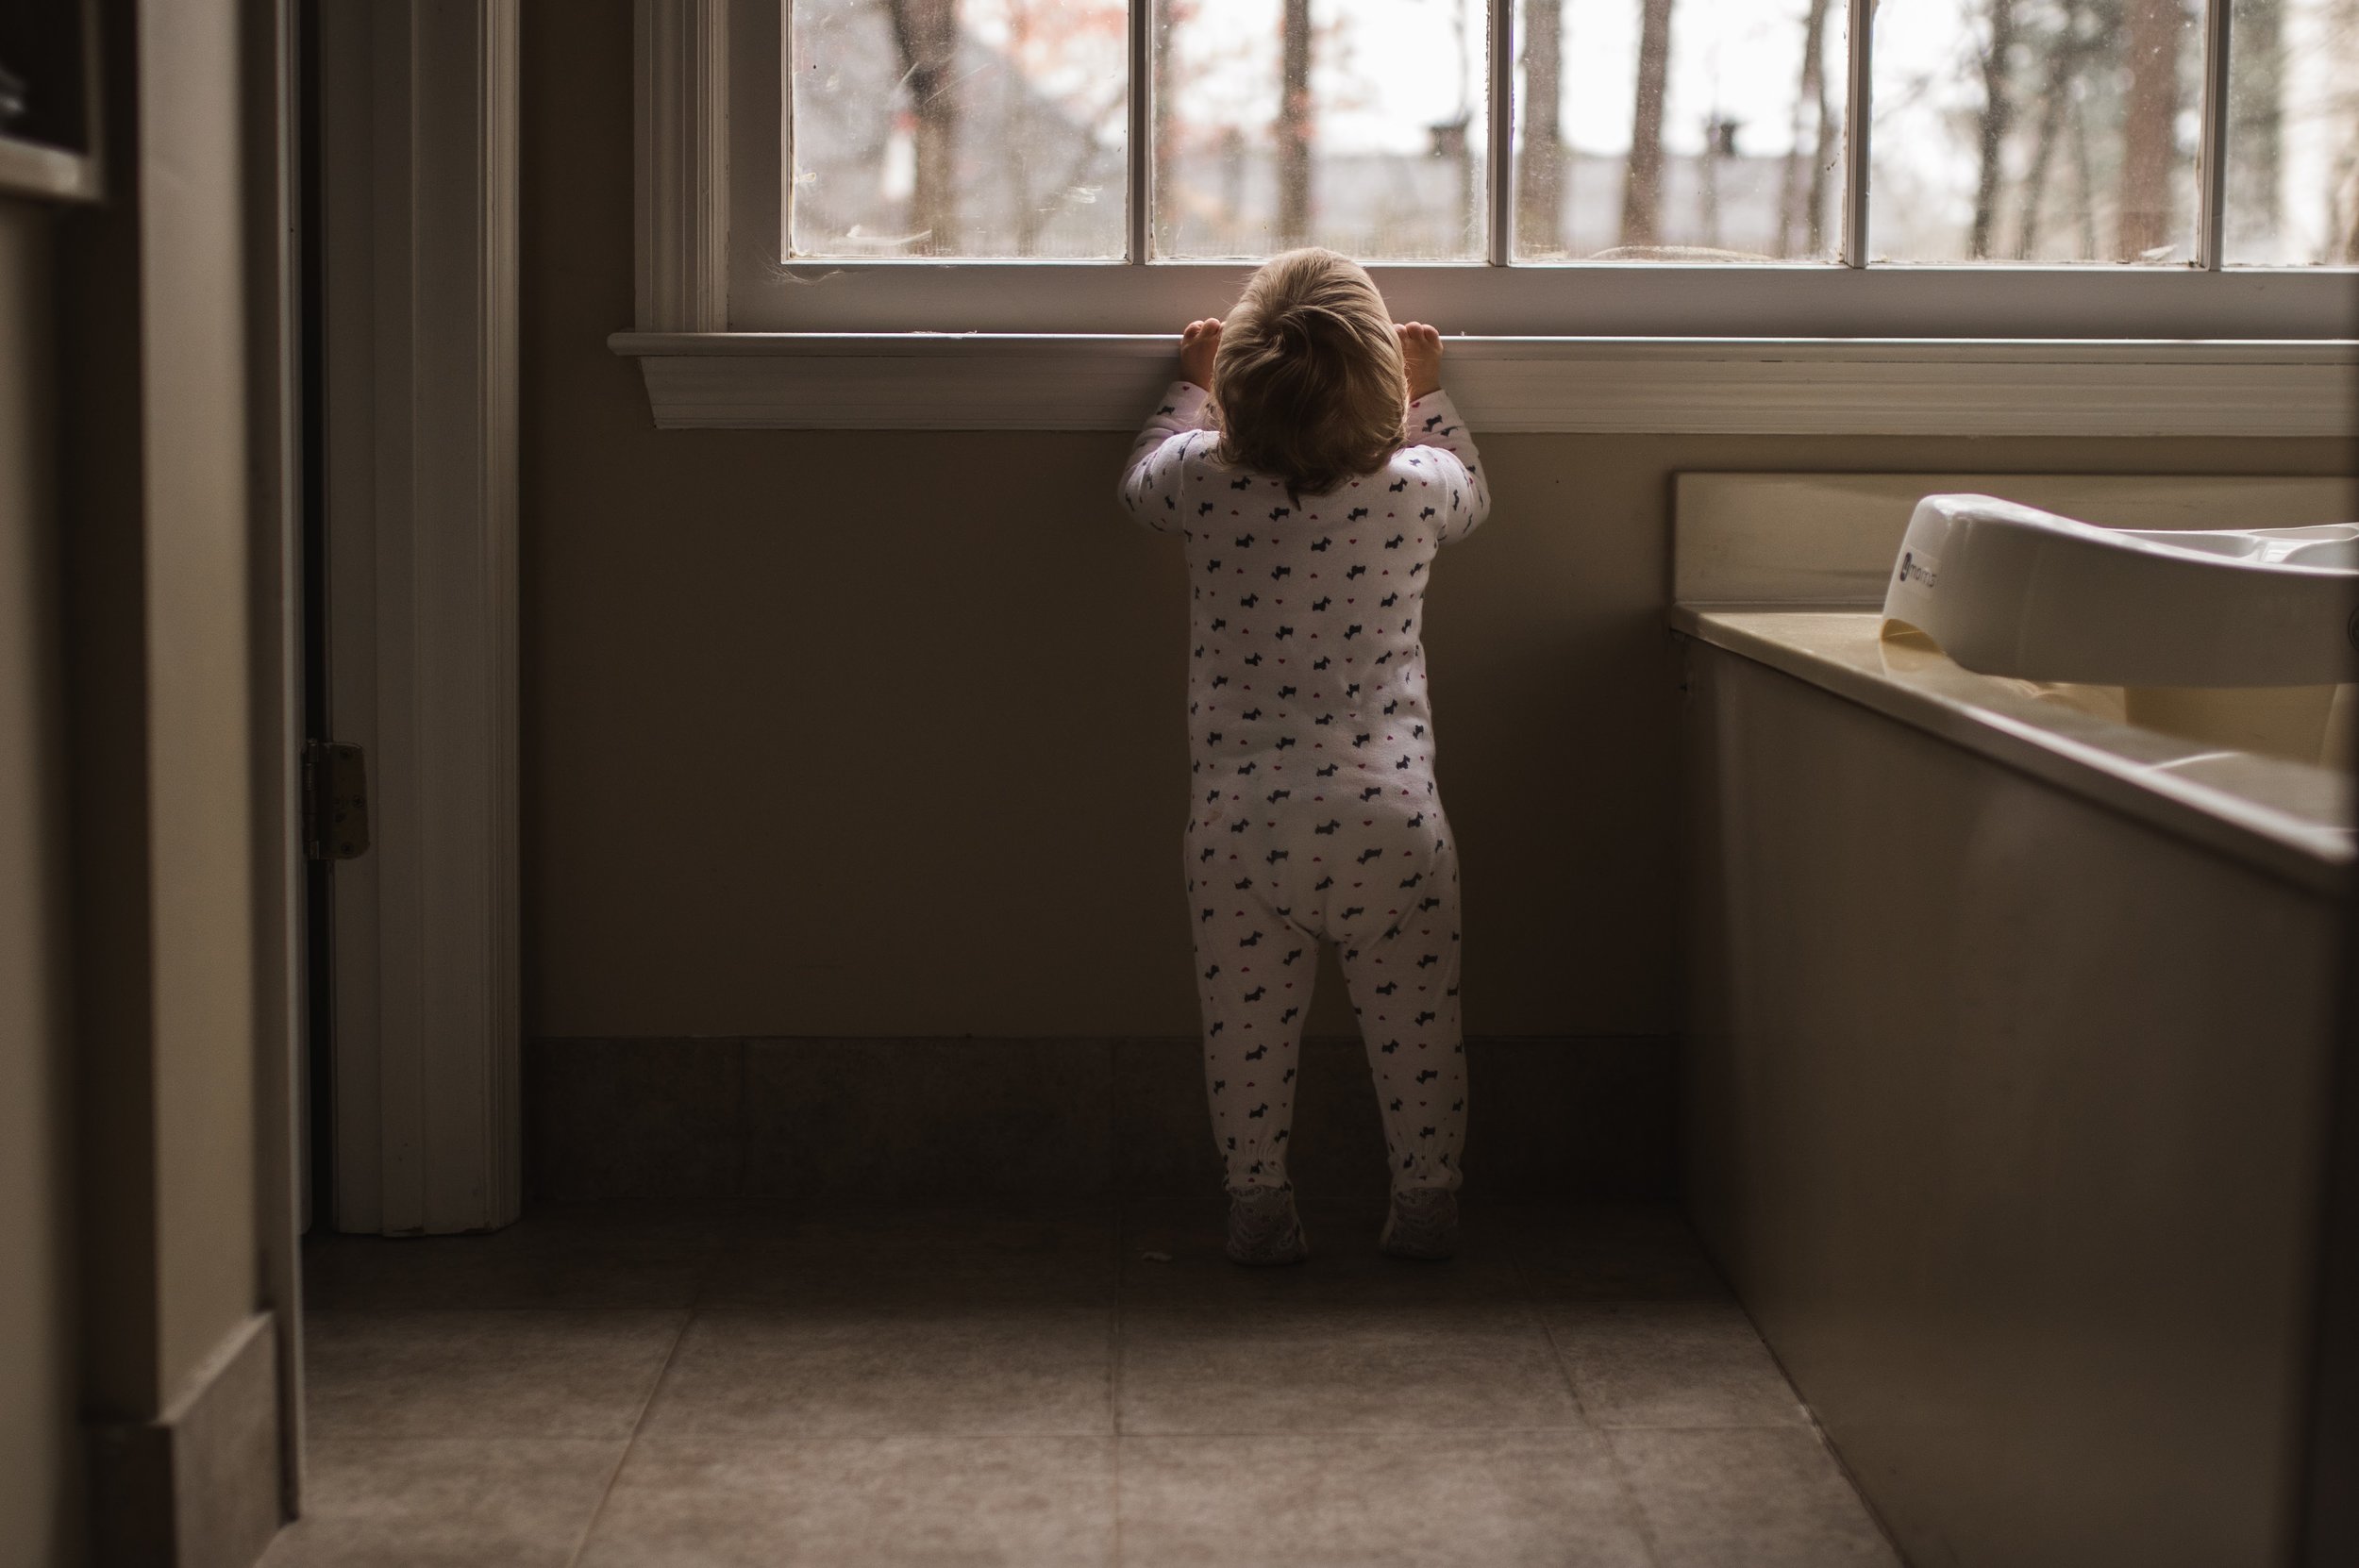
Here's another image where I got down low to capture the world as my daughter sees it. By getting low it makes the viewer feel like they are right there in the scene.
Another trick I used here is to shoot in layers. There is a clear background, middle, and foreground. You can do this at home by picking up toys and placing them in front of your camera or outside by shooting through leaves and trees. I do this all the time in my client shoots too.

3. Capture them in Action
The key to this tip is to plan, plan, plan. I always let the moment unfold organically, but that doesn't mean I won't set up the scene beforehand. For example, in the image below I knew I wanted to capture my daughter doing one of her favorite activities - painting, but I made sure to set up the paper and paint in an area of the house with some pretty light. Once set up, I hinted over to the area and let my daughter discover it on her own. I had the camera in my hands, but did not start immediately snapping pictures. Likewise, before taking the other photos in this section, I made sure that beds were made, floors were cleared of clutter, and toys were strategically placed in little pockets of light waiting to be discovered.
My favorite activities to photograph
Painting on a large scale - $7 giant roll of paper taped up on the wall with some washable paint = Endless hours of fun
Cooking. Next time you're making dinner set aside a small bowl and whisk and let your little one help with the mixing. Will it make a mess? Probably! Just make sure to move your table close to a window so you can capture that mess in beautiful light.
Sprinkler/Slip and Slide - What's more fun than a toddler running through a sprinkler eating a popsicle? Not much! Set up your sprinkler early in the morning or before the kids get ready for bed. The light will reflect off of the water and make your photos extra fun! Plus, you won't have to deal with any harsh light at those times.


In the below photo, I saw some dappled light coming through the trees making a perfect pocket of light right before the stairs on my back deck. I cleared off the deck and placed the toy plane right where I wanted and then waited for my daughter to find the toy on her own. By doing it this way, I am still able to capture genuine candid photos but in an environment of my choosing.


4. Don't ask them to smile
We've all been there... You pull out your camera and tell your kid to 'say cheese' and they give you the eyes half closed, fake semi smile a la picture #1 below. Now check out the picture after that - Big natural smile. How did I do it? Instead of asking her to smile I set my camera down and started tickling her. Then I took a few steps back and pretended to run up and tickle her again. At the last second I backed up and snapped picture #2. Most kids will start smiling even if you say the word 'tickle'.


Here's another example where I was able to get that sweet smile without asking her to 'say cheese'. She and a friend were having a contest to see who could roar the loudest (See picture #1 mid roar). As soon as the roaring stopped, the giggles started. This gave me a chance to snap a few pictures of that sweet laugh.
Along with roaring, other tricks I use are to ask your kids to sing their favorite song, play the telephone game (this is great for older kids!!!), tickle a buddy, and play peek a boo from behind the camera.


I hope you found these tips helpful! If you want more tips and tricks like these, subscribe to my newsletter, where I send my best info straight to your inbox.